

in horizontal hives.

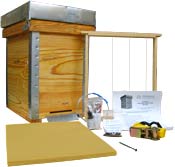
Extra-deep Frame Plans
A year ago I had no idea how to use a table saw or what a “rabbet” was. It all changed after reading Keeping Bees With a Smile. I now make my own frames and hives and all. It is fun and even addictive — my wife keeps reminding me that beekeeping is about honey, and not about woodworking! :)
Here is how I make the extra-deep frames described by Fedor Lazutin (pp. 339 and 370 of Keeping Bees With a Smile). I use a table saw with a dado blade and a drill press with a 3/8” mortising attachment. All bars are made of untreated dimensional pine lumber (“two-by-” boards for top bars and end bars, and “one-by-” boards for bottom bars). If you find clear boards free of knots, there is almost no waste, and lumber costs about 40 cents per frame.
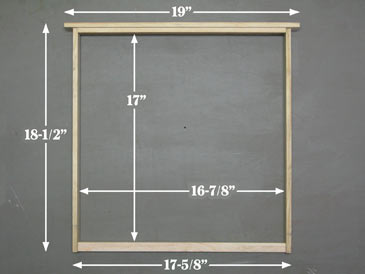
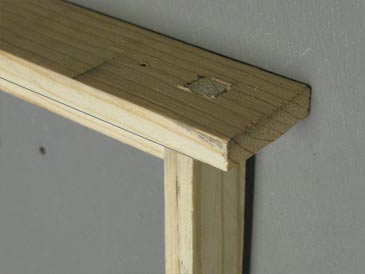
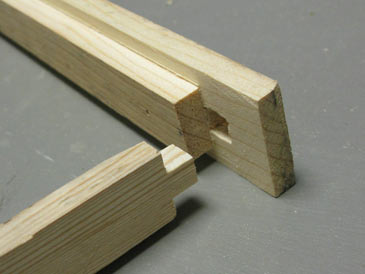
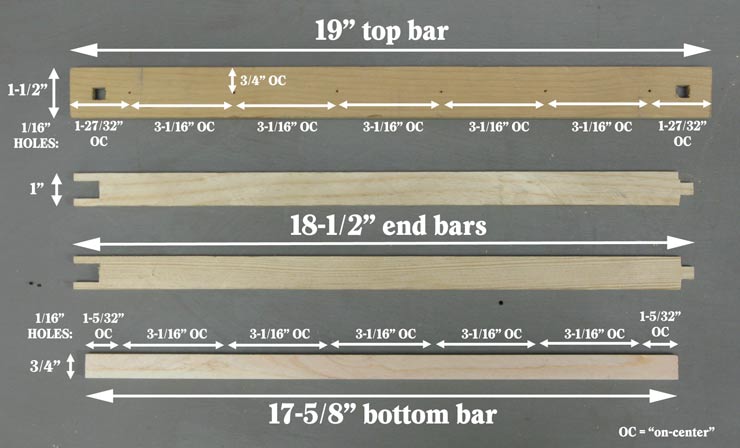
The frame has standard length (17-5/8” long with a 19” top bar - same as Langstroth). It consists of four parts: a top bar, two identical end bars, and a bottom bar:

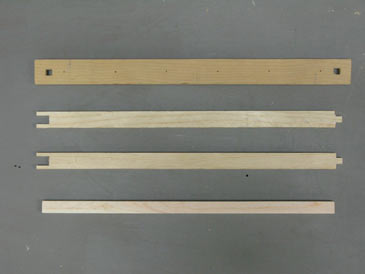
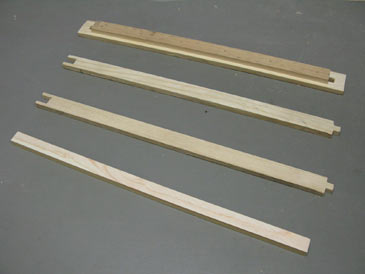
The mortise-and-tenon joints are very strong and require no nails. The frame is assembled on wood glue:


Here are all the dimensions:

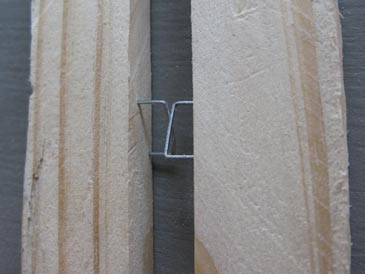
To maintain the required spacing between the frames in the hive, you need some kind of divider. I use 1/2” heavy-duty staples (like “T50”) on each 3/8” side of end bars. The staples stick out by 1/4”. Drive the staples in at exactly the same spot on all end bars (e.g., 12” down from the top end). Tilt the staples in the same direction as shown on the last picture above. You can use other dividers as well (e.g., short roofing nails or small strips of wood).
These frames are wired vertically using regular tin wire. This is the method Fedor Lazutin arrived at after a decade of experimentation. By wiring the frames vertically rather than horizontally, you remove strain from the end bars and can keep them just 3/8” thick. This way the frames can accept standard wax foundation (two deep sheets). You can also go foundationless by using a 1” starter strip of wax foundation.
Building instructions
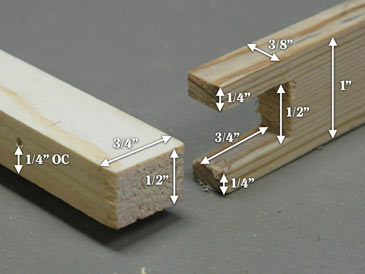
Top bars:
- Cut a 19” piece of “two-by-” lumber.
- Rip it into 3/4” strips on a table saw.
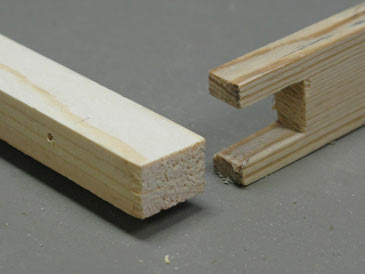
- Cut a rabbet 1/4” wide by 3/8” deep along two long edges (use a dado blade).
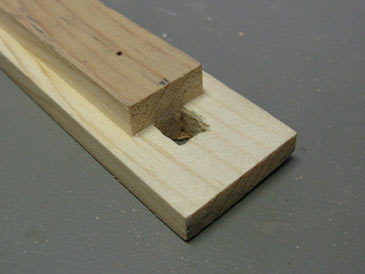
- Cut a rabbet 1-1/16” wide by 3/8” deep on each end of the bar, forming the frame rests (use a dado blade).
- Cut two mortises (use a drill press with a mortising attachment).
- Drill six holes for wiring (tip: drill from the bottom side and use a fence to keep all holes on the same line).
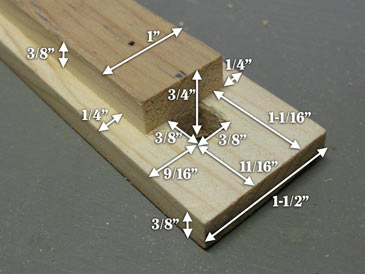
End bars:
- Cut an 18-1/2” piece of “two-by-” lumber.
- Rip it into 1” strips. You’ll end up with bars 1” x 1-1/2”.
- Cut a rabbet 5/16” wide by 3/8” deep on each 1-1/2” edge at one end of the strip (use a dado blade; a tenoning jig recommended for accuracy and safety).
- Cut a dado 1/2” wide by 3/4” deep in the center of the other end of the strip, parallel to the 1-1/2” side (use a dado blade; a tenoning jig recommended for accuracy and safety).
- Rip the strip into 3/8” bars. Done!
Bottom bars:
- Cut a 17-5/8” piece of “one-by-” board.
- Rip it into strips 1/2” wide.
- Drill six holes with a drill press (tip: drill from the side that will face upward and use a fence to keep all holes on the same line).
These surely take some time to make, but much effort can be saved by processing a large number of pieces in each operation before switching to the next one.
I’ll appreciate your comments, suggestions, or questions. Happy woodworking!
— Dr. Leo Sharashkin, Editor of “Keeping Bees With a Smile”
Please join our email list below for more free plans and important updates (no spam; only 2-3 emails per year, and you can unsubscribe at any time). We are working on bringing you the bees... and the smile!