


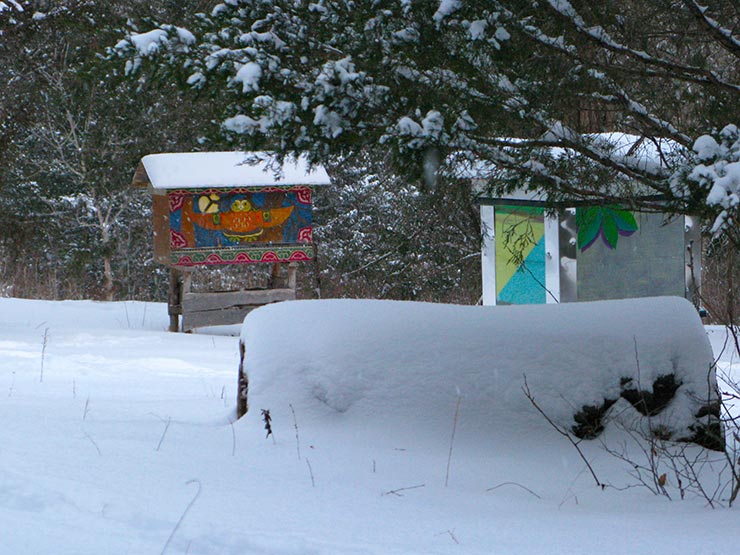
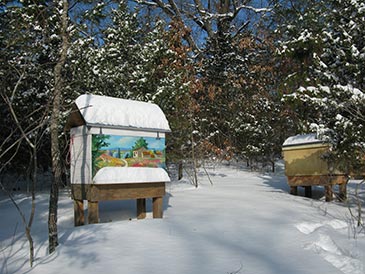
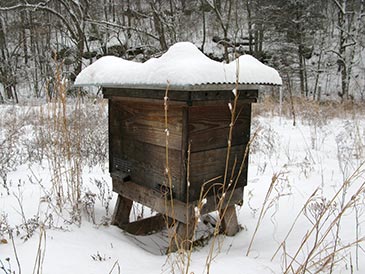
Wintering Horizontal Hives
LAYENS HIVES and EQUIPMENT AVAILABLE FROM OUR STORE >>
Hives include all frames, fully assembled & ready to go
Getting bees ready for the winter is not unlike preparing to spend a few months in a mountain cabin trapped by snow. You’d need to be in good health, insulate your cabin well, stockpile high quality fuel and food (and keep the mice out of it!), and have good company. Follow the same blueprint with your bees, and they will delight you with the buzzing of healthy strong colonies come spring.
In a nutshell...
- Use local bees
- Practice artificial swarming
- Leave bees enough honey
- Make the nest snug for winter
- Insulate hives
- Exclude mice
The most important part of winter preparation is not about hive design and insulation — it is about having the right stock of bees.
Just like us humans, honey bees are children of the tropical climate. And just like us, they can survive the cold by seeking shelter and adapting to local conditions. With humans, different ethnic groups have traits that aid survival in different environments: the Inuit in Greenland have genes that help them digest large amounts of animal fat; North Europeans have genes for digesting lactose in cow’s milk; people living where malaria is endemic have genes for resisting this disease, etc.
Likewise, local adaptations permeate bees’ biology and behavior: some strains have longer tongue to work local flowers, some have higher body fat content to stay warm during long winters, and some are particularly ferocious to ward off dangerous predators. Rearing brood (when and how much), resisting parasites and disease, foraging, swarming — all these things differ in different places. Besides, bees’ generations turn over much faster than humans’, so adaptations may only take years to arise, instead of centuries or millennia.
This is the reason local bees are the most crucial element of natural beekeeping, as stressed by Fedor Lazutin in Keeping Bees with a Smile and by Georges de Layens in Keeping Bees in Horizontal Hives. It only makes sense that bees bred in the north for many generations would be a better match for wintering in Wisconsin than package bees of subtropical Italian race bred in Florida — but, again, it is not just about winter hardiness. Bees need to be resistant to pests and disease and be frugal with winter reserves. To make more honey when nectar is available, and to not squander the resources during dearth, the colony should raise brood at the right time of the year as dictated by the timing of the local blooming of plants — all these conditions are unique to every location (called “bioregion” or “biological region”), and local bees will always be a better match than bees brought in from elsewhere.
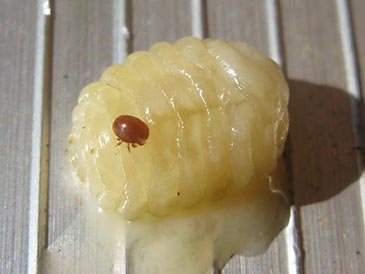
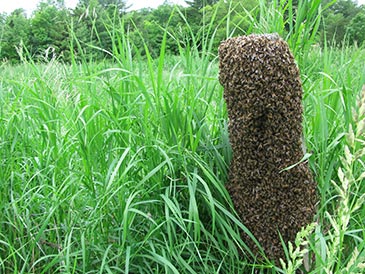
In nature, swarming interrupts brood rearing and cleanses colonies of parasites and disease. This is because many parasites (e.g., Varroa mites) and disease (e.g., European foulbrood) breed on honey bee brood (larvae and pupae) — so the temporary absence of brood messes up the parasites’ reproduction.
Colonies living in spacious horizontal hives will have more room to produce brood than in nature, and may not swarm every year. Making artificial swarms will increase the number of your colonies and will make them healthier. And, if done at the right moment, artificial swarming will contribute to a good honey harvest — see details in Keeping Bees in Horizontal Hives, pp. 185 and 258, and the Afterword to Keeping Bees with a Smile, 2020 edition.
Colonies that went through artificial swarming and experienced a brood cycle break earlier in the season are more likely to winter successfully compared to very large colonies that had plenty of brood at all times and never swarmed. We make artificial swarms with at least half of our hives every year — highly recommended. Avoid making artificial swarms / splits too late in the season or before anticipated dearth — the colony needs to have sufficient time and resources to build up strength by the end of the season. For example, here in the Ozarks of southern Missouri, July and August are usually hot and dry, with little nectar available. So late-June artificial swarms would not thrive most of the years. However, artificial swarms made in the second half of May through early June take advantage of strong honeyflows in late May and in June and gain good strength before the dearth.
3. Enough bees
The population of a colony will decrease in the fall, which is normal. But sometimes a strong prosperous colony dwindles at the end of the season, which is not a good sign. Here are a few reasons this may happen:
- Disease. If you use commercial bees that produce a lot of brood but have low disease resistance, and if you do not treat these bees against the Varroa mites, by the end of the summer the mite infestation reaches the level where the viruses start taking a toll on the colony. The conventional advice, of course, is to treat colonies against the Varroa mites, but a proven natural alternative is to use wild local bee stock (see #1 above) and let them experience a brood cycle break earlier in the season (#2 above) — do this and most of the colonies will be robust come fall even after an unfavorable season.
- Late swarming. The colony may have swarmed late in the season and failed to regain strength. Two common reasons for that: a) the colony got overpopulated — timely artificial swarming earlier in the season would have solved that (see If bees run out of room), and b) you are using commercial bees with southern genetics (e.g., Italians), which are more prone to swarming (solution — use local swarms).
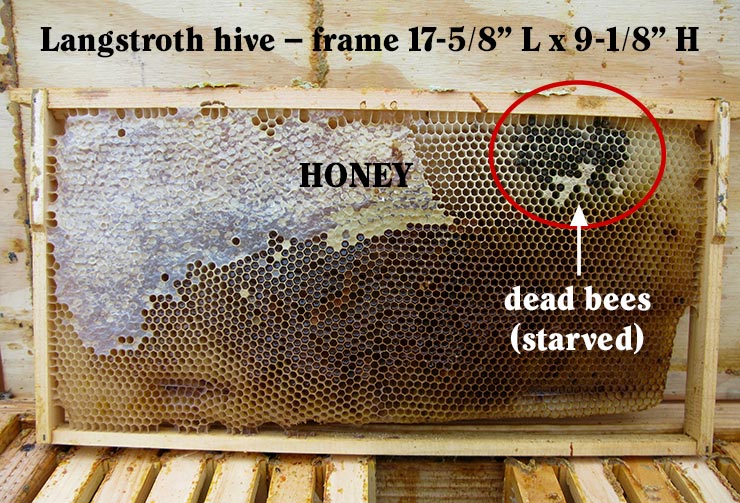
- Honey-bound brood chamber. If you live in an area of very abundant honeyflow, the bees may have filled all available cells with honey, leaving the queen no room to lay. When this happens, the population can dwindle almost to nothing, leaving you (or the robber bees) a hive full of honey. Prevention: don’t let the bees run out of room; arrange the frames as shown in Keeping Bees with a Smile and Keeping Bees in Horizontal Hives.
It is easier for a sizable colony (bees densely cover several frames in the fall) to heat and ventilate their cluster for optimum wintering, but I have also seen smaller colonies winter successfully on just 1-3 combs, as long as they are healthy, have high-quality honey reserves, and ample insulation.
Leave bees sufficient winter stores of their own honey. The exact amount to leave depends on colony size, bee genetics (local northern bees are more frugal than commercial Italians), hive insulation, and length and severity of your winters. Strong colonies rarely need more than 9 frames (of which 7 frames would be one-half to two-thirds full of honey). See more detail in Keeping Bees with a Smile and Keeping Bees in Horizontal Hives and in the next section.
5. Don’t give bees too much room
You may feel that leaving the first-year colony all their honey for the winter is the best course of action, but leaving too much honey is actually as dangerous as not leaving enough. A smaller colony that would thrive on 5 frames would really struggle on 12 frames: the extra volume causes the heat to dissipate, all the extra honey has high thermal mass (i.e., the ability to absorb heat) and since the bees can’t keep all that volume warm, the honeycombs will cool to the point of condensation forming on them, leading to moisture problems and mold growth, etc. Imagine yourself in a small room (brick walls) with a small woodstove going — it would make for a cozy space, but you would be freezing in the room five times the size. Medieval European aristocrats knew this too well: their enormous castles with high ceilings were impossible to heat — thence the use of canopy bed curtains.
We use the wintering setup shown in Layens’s book, Chapter 24. For example, for a strong colony (bees cover 7 frames) at harvest time leave up to 7 frames at least 1/2 full of honey (about 30 lb), plus (in cold climates with springs that can be cool or rainy) two extra frames more or less full of honey, one on each end of the nest (9 frames total, about 45 lb). Fewer frames are required for smaller colonies or in southern climates with short winters.
6. Use divider boards
Cut off the unused empty volume with a divider board. This limits the volume bees have to heat, and the empty chamber provides additional insulation. In very cold climates, or if your hive is not insulated, position the wintering frames in the middle of the hive and use a divider board on each side.
We leave a 3/4” gap under the divider board so the moist air can move from under the wintering cluster into the empty chamber and out through the vents in the roof. This provides slow bottom ventilation that is sufficient in most climates.
7. Choose the right hive model
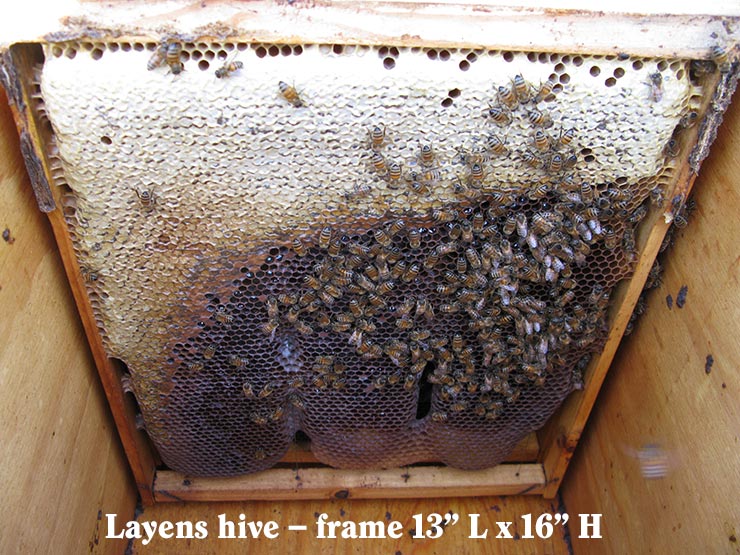
We do not recommend using horizontal Langstroth hives in cold climates. The shape of the frame and of the nest (too shallow and too wide) makes it difficult for the bees to heat and limits their access to food. (And in the summer it is more difficult to cool and ventilate.) The Layens frame (deep and narrow) mimics the shape of honeycomb inside a bee tree, and results in better wintering. After comparing long Langstroth and Layens hives side-by-side (and reading research on that topic), we converted all our apiaries to the Layens hive, and this is the hive we recommend.
By contrast, the Layens frame (below) is tall and narrow, so honey is always above the bees; it is kept warm by the heat rising from the bee cluster and remains accessible to the bees no matter how cold it is outside.
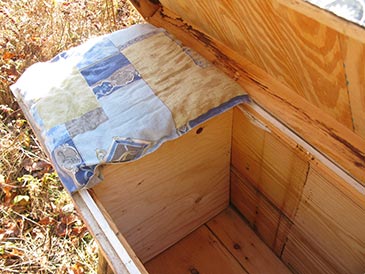
The 20-frame Layens hive insulated with natural wool offers the best protection from the cold of the winter and the heat of the summer. The walls and the bottom are permanently insulated with 1-1/2” of fleece; frames’ top bars are covered with a pillow stuffed with wool. A pillowcase filled with natural wool is best and has far better insulation value than other materials such as wood shavings. Leave at least 1/2” air space around and above the pillow to aid ventilation. This is our favorite wintering setup.
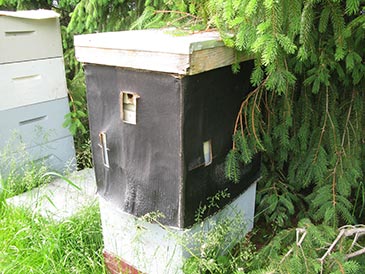
You can successfully overwinter bees in thinner-wall hives if you wrap them for the winter. Here are a few options:
- Black roofing paper / tar paper / roofing felt is common winter insulation, stapled to the hive box. It does not add a lot of insulation per se, but it blocks out wind and its black color increases solar gain of the hive in the winter sun. I’ve also seen Amish beekeepers leave a 1” to 2” gap between the tar paper and hive walls and fill this space with sheep wool, using baling twine to hold everything together. This is a very good setup if you cover everything from above to keep the wool dry.
- Straw — attaching straw to hive walls adds excellent protection (as recommended by Layens), but requires long straw. Insulating with straw is very labor-intensive and you will probably have to harvest it yourself because straw sold in square bales passed through a combine, got copped up and is not suitable for this application.
- Plaster made of raw cow manure, straw, ashes, and clay/dirt makes for “natural Styrofoam” that is warm, breathable, and surprisingly durable. Mix all ingredients with some water, spread on the walls, and let dry. (See more in Keeping Bees with a Smile.) It adds excellent year-round insulation to single-wall hives, but may look too rustic to many people’s taste, plus most people today don’t live within walking distance of cow pies and may even find this excellent natural material repulsive.
- Rigid foam insulation (“Styrofoam”) — cut panels to size and attach with small screws to hive walls. Styrofoam has very high insulation value, but it is not recyclable, traps moisture inside the hive, and is susceptible to critter damage — three reasons we strongly prefer natural wool.
Unless your winters get extremely cold (e.g., Michigan, interior Canada and similar) it is not necessary to insulate the bottom: the hive entrance remains open, the cold air enters the hive and sinks to the bottom, keeping it cold whether it is insulated or not.
9. How much winter ventilation is needed?
If your hive is well insulated and your colony is strong, in most climates you don’t need to worry about providing bees with additional ventilation in winter. After all, bee nests in tree hollows only have the entrance for ventilation, and bees thoroughly seal all other openings with propolis. Warm walls and ceiling prevent condensation, the nest stays dry despite high air humidity inside the nest, and excess moisture is eliminated through the 3/4” gap under the divider board and up through the roof vents. See a thorough discussion in Keeping Bees with a Smile.
If your hive has a screened ventilation slot in the bottom (our 14-frame and 12-frame solid-wood models) I’d leave this slot open here in southern Missouri (Zone 6). I would keep it open father south; and I would block it father north and in areas with high winds.
10. Only one entrance open
We only leave one entrance open. It is usually a bottom entrance. On several occasions when bees were most actively using the central top entrance in the fall, we winterized the hive with the partially open top entrance (all bottom entrances closed), with good results.
The warm moist air in the nest rises. Open top entrance means greater moisture evacuation but greater heat loss. Open bottom entrance means less moisture evacuation and minimal heat loss, and this is what we use the most.
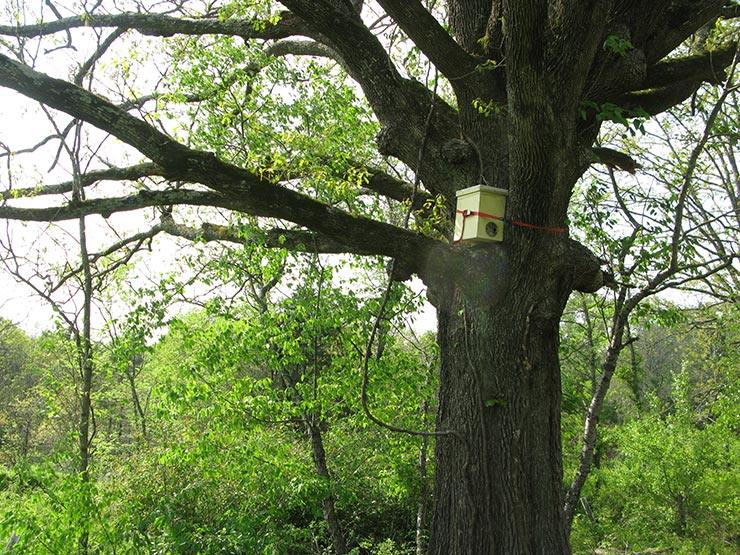
In nature, bee nests are often found high in trees beyond the reach of mice. Since our hives are much closer to the ground, we need to provide mouse guards in the winter.
Whatever mouse guard you use, it should have openings that are small enough so mice can’t get in, but large enough that bees can come and go during a warm winter spell. 3/8” to 1/2” square mesh or round openings work well.

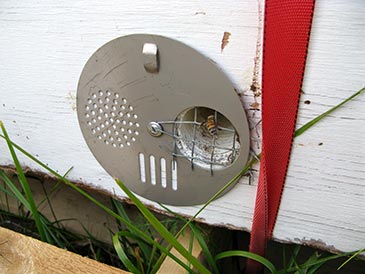
If your hive has a slot entrance, staple 1/2” or 3/8” square wire mesh over the entrance, or attach it with small lath screws.
Install the mouse guard while bees are still active and temperatures are in the 50s — that is before the mice make their way into the hive. If you wait too long and install the mouse guard after it gets cold and bees cuddle down for the winter, you risk trapping a mouse inside the hive if it’s there already. Remove the mouse guard when bees become active in the spring.
12. Wind break
When you set up your hive, turn the entrance away from the prevailing winds. If strong cold winds are common in the winter and the hive is exposed, a makeshift wind break (such as straw bales) is highly beneficial.
Alright! With all these great preparations your bees now have nothing to fear even if Grandpa Frost pays you a visit on the New Year’s Eve.
Happy New Year!
LAYENS HIVES & EQUIPMENT AVAILABLE FROM OUR STORE >>
Hives include all frames, fully assembled & ready to go
Many more guides are in progress, so please join our email list below for more free advice and important updates (no spam; only 2-4 emails per year, and you can unsubscribe at any time). THANK YOU! – we’re working hard to bring you the bees... and the smile!
— Dr. Leo Sharashkin, Editor of “Keeping Bees With a Smile”