


Convert Langstroth Hives to Layens – Simple Jig – Free Plans
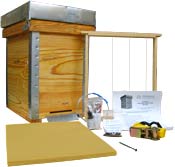
LAYENS HIVES AND FRAMES AVAILABLE FROM OUR STORE >>
Hives include all frames, fully assembled & ready to go
Keeping Bees in Horizontal Hives describes four great methods for transferring bees from one hive model into another. They are all fully applicable to transferring bees from Langstroth hives into Layens hives. Each method has its advantages and limitations — see the book for details and step-by-step instructions. Some are very quick (cut comb from old frames an insert it into new frames), but messy, intimidating for the beginner beekeeper, and harder on the bees. Others are very simple (e.g., cut a hole in the bottom of the Layens hive, attach a Langstroth nuc box underneath and let the bees “grow” into the Layens as they expand) — but these methods may take a long time and work best with stronger colonies.
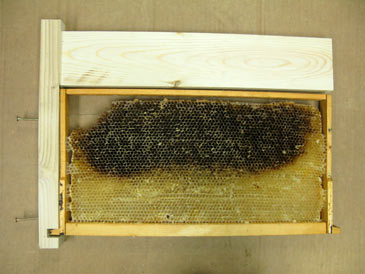
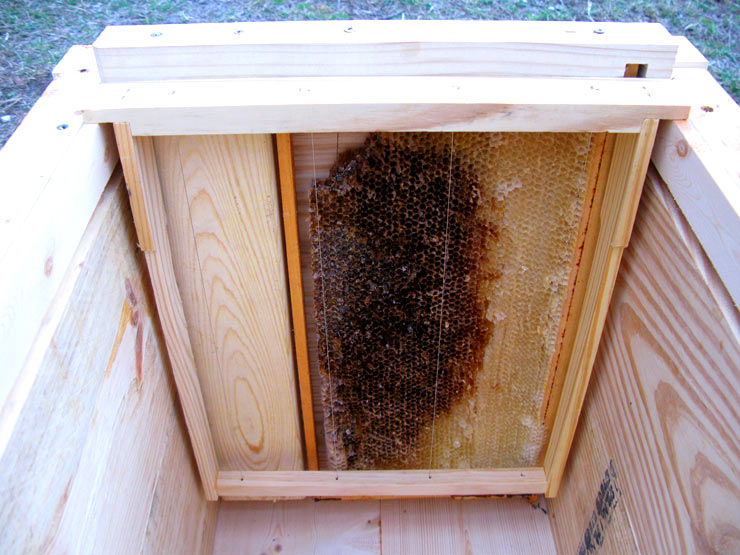
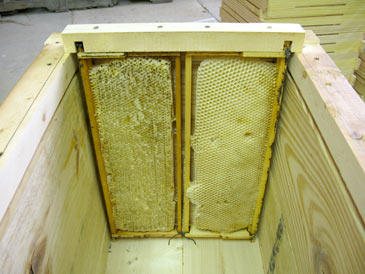
There are several more ways to accomplish the transfer. My favorite approach consists of rotating Langstoth frames 90 degrees, attaching them to a special frame, and inserting them into the Layens hive whose walls are temporarily augmented to accept such deeper frames. Here is how it looks.

I like this method because it is 1) gentle on the bees, 2) quick and simple, 3) individual frames stay mobile and can be removed from the hive as soon as they are empty of brood.
Material list- If converting DEEP Langstroth frames, two boards 2” x 4” x 8’ (untreated) will be enough to make the rim for a 14-frame Layens hive and five conversion frames.
- If converting MEDIUM Langstroth frames, one board 2” x 4” x 8’ (untreated) will be plenty.
- 2” wood screws, 28 per hive.
Tools list
This simple project only requires a table saw, cordless drill/driver, and a tape measure.
Building instructions
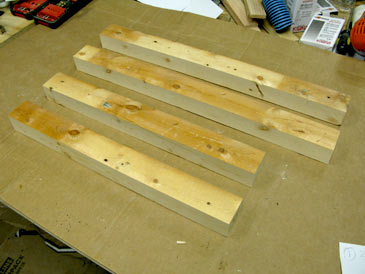
Step 1. Cut the following from a “two-by-four”: two pieces 21-7/8” and two pieces 17-11/16”. Rip a 2” strip from each piece (and save the rest of each board, you’ll need it in Step 3). You end up with four boards: 21-7/8” x 2” x 1-1/2” (2) and 17-11/16” x 2” x 1-1/2” (2). These form the rim to make your Layens box deeper so it can accept the rotated Langstroth frames. Note: the long bars you made in this step have the length equal to the inner length of the hive wall. If your Layens hive holds more than 14 frames (e.g., 20 frames etc.), make the bar correspondingly longer.
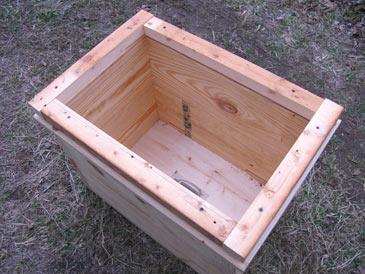
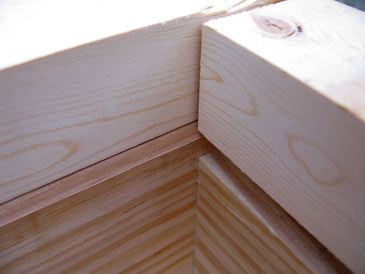
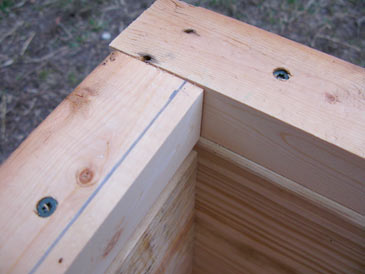
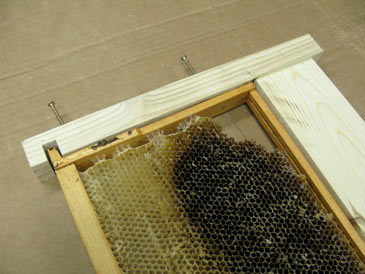
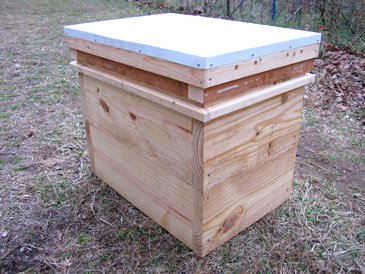
Step 2. Attach the bars from the previous step to the top of the Layens box so they are flush with the inner surface of the walls. They will protrude 1/2” beyond the outer surface of the walls to support the lid. Draw a thick line 3/8” from the inner edge of the long bar. This is your guide for aligning frames.
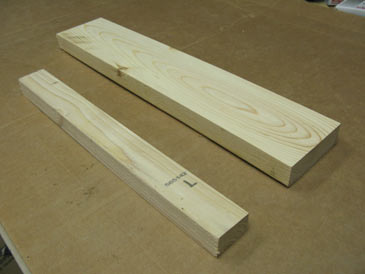
Step 3. Make five top bars 14-5/16” x 1-1/4” x 1-1/2” (use the four cutoffs left from Step 1, as well as one new piece of “two-by-four”). If you are converting MEDIUM Langstroth frames (they are 6-1/4”), go to Step 7 now. If you are converting DEEP frames (9-1/8” deep), cut five fillers 17-3/4” x 1-1/8” x 3-1/2” from “two-by-four” stock and proceed to the next step.
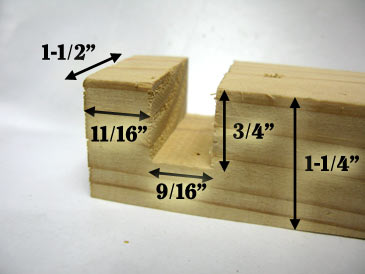
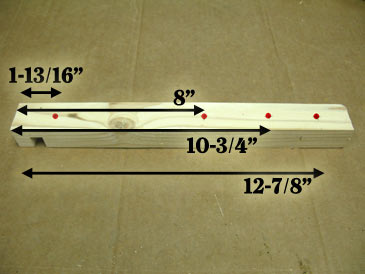
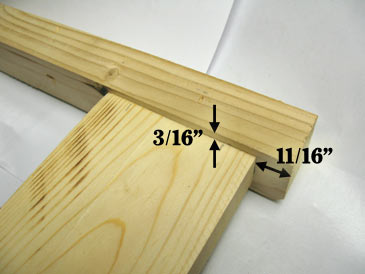
Step 4. Cut a rabbet 3/4” deep x 9/16” wide, 11/16” from one end of each top bar. Drill four 1/8” holes along the central axis of the top bar, 1-13/16”, 8”, 10-3/4”, and 12-7/8” measured from the end closest to the rabbet.
Step 5. Attach the filler board to the top bar 11/16” from the end and 3/16” in from each edge using two 2” screws. You attach it on the same side as the rabbet. Assemble as many frames like that as you need.
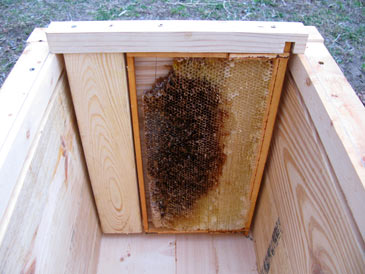
Step 6. When ready to transfer the bees, take a deep Langstroth frame with brood, insert its lug into the rabbet and attach with two 2” screws through the pre-drilled holes in the top bar. Then lower into the Layens hive against the wall farthest from the open entrance. Repeat with other Langstroth frames containing brood. Position the frames in the following order: 1) all Langstroth frames containing brood, then 2) several Layens frames (containing empty comb, foundation, or 1” foundation strip as a guide for foundationless frames). Langstroth frames that do not contain brood — brush all bees from them into the hive and remove these frames from the apiary. Feed the colony if there is no honey flow yet. Keep adding Layens frames during the season. Check Langstroth frames periodically and remove those that are free of brood. You can also wait and remove broodless Langstroth frames at the very end of the season, in which case make sure the colony has enough winter honey reserves on the Layens frames that stay inside the hive.

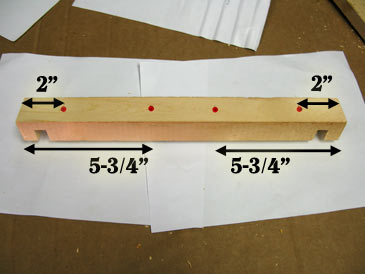
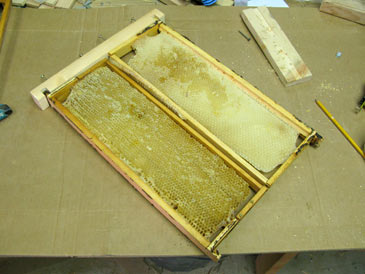
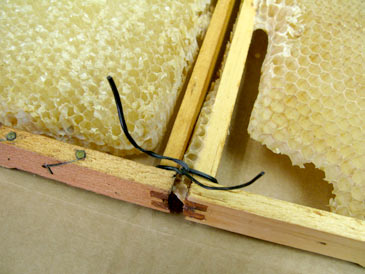
Step 7. If you transfer MEDIUM Langstroth frames, it’s even simpler: you can attach two medium frames to each top bar. Take the 14-5/16” x 1-1/4” x 1-1/2” bars cut in Step 3, and cut two rabbets in each bar. The rabbets are 3/4” deep and 9/16” wide, 11/16” from each end. Drill 1/8” holes on the central axis of the top bar, 2” and 5-3/4” from each end. Insert the frames and attach with 2” screws. If the bottoms of the frames are out of plane, tie them together. Done. Install the frames in the hive as described in Step 6.
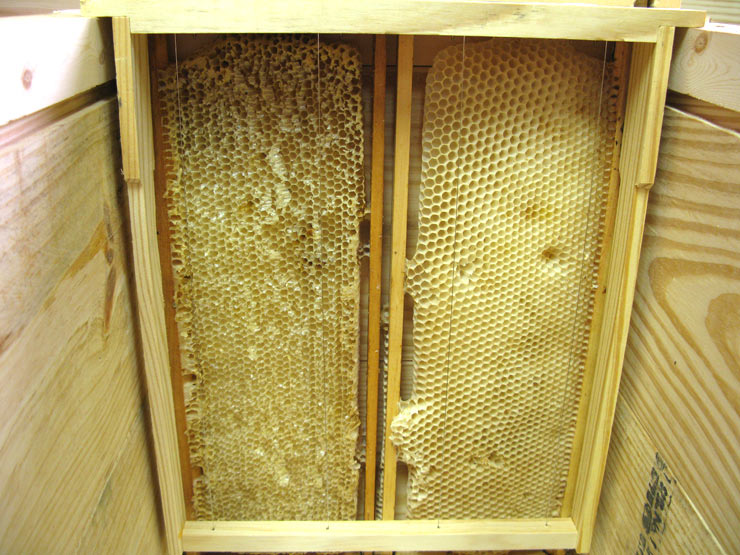
When no more Langstroth frames remain in the hive, you can remove the temporary rim. For this, remove all the Layens frames one by one (it’s handy to put them into an empty Layens hive). If bees built small combs from the bottom bars of some Layens frames (because the box wax temporarily deeper), trim this comb with a knife. Remove the rim, then put the frames back in. Transfer complete.
LAYENS HIVES & FRAMES AVAILABLE FROM OUR STORE >>
Hives include all frames, fully assembled & ready to go
If you haven’t signed up for our email list yet, please join it below so we can notify you when more free Layens plans become available. (Only 2-3 emails per year, and you can unsubscribe at any time.) We are working to bring you the bees... and the smile!
— Dr. Leo Sharashkin, Editor of “Keeping Bees With a Smile”