


Hinges for Roof – Insulated Horizontal Hive – How to Install
HINGES SHOWN BELOW ARE AVAILABLE FROM OUR STORE >>
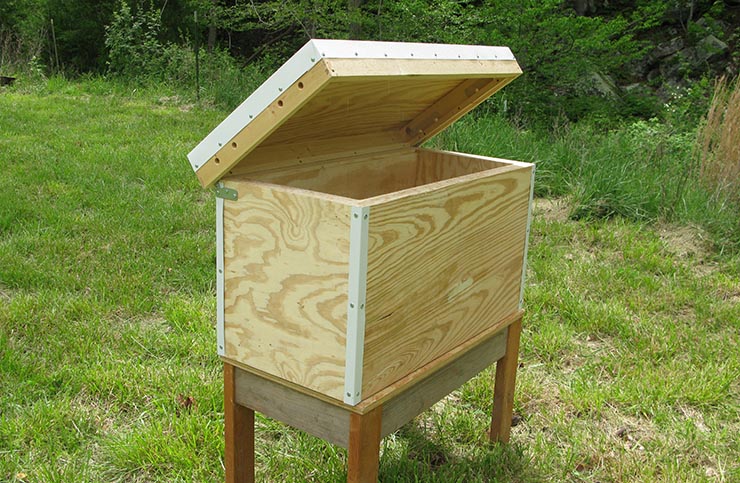
Open your horizontal hives like a treasure chest!
Add hinges to your horizontal hive roof – peaked or flat – and it opens like a treasure chest (which it is)! Our hinges work with any horizontal hive model, and here is how to install them on the Insulated Layens hive that you bought from us (thank you!) or built using our free plans.
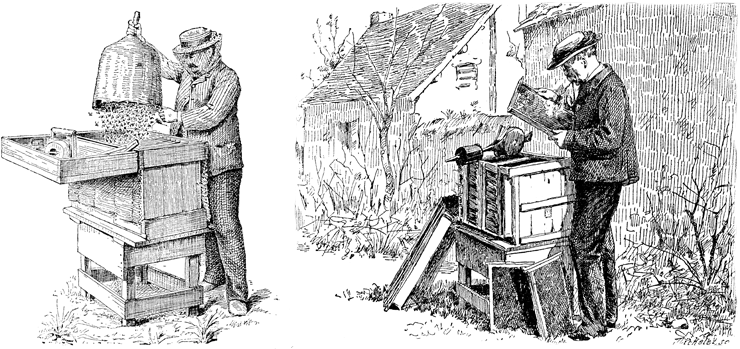
Georges de Layens liked hinged roofs and recommended them in his book Keeping Bees in Horizontal Hives, but he also used horizontal hives with removable roofs – so pick what you prefer!
Layens’s original hive design had the lid that opened 180° as shown above. The open lid could serve as a tray for your smoker and light tools (that’s handy!), but it suddenly created a 20-inch overhang over the hive entrance, disorienting some of the bees returning from the field and drawing their attention to you! Besides, you had to step around the hive to open and close it, and had to do so carefully: if you let the lid drop open, it could damage the hinges, and it also gave the hive a sudden jolt, alerting the bees to your presence.
So most horizontal hives with hinged roofs today open 90° to 110° – you can conveniently open and close the lid standing behind the hive, on the side opposite the entrance, and the raised lid creates a privacy screen between you and the bees flying in front of the hive. Here is how the insulated Layens hive looks with its flat roof opened on hinges. If you like it, read on!

WHAT YOU’LL NEED
- A pair of special hinges (available from our Store)
- 1/2” lath screws, sharp point. Quantity: 6
- 3/4” wood screws with the head diameter of 1/4” or less. Quantity: 6
- Screwdriver with assorted bits
- Drill bit for metal, diameter 1/4” or bigger
- Drill bit with countersink for #8 screws (or just a 3/32” bit)
- Metal sheers
- Sander with 80-grit sandpaper (or a piece of sandpaper 80 grit or less)
- Oscillating saw (or another kind of saw, even a handsaw will work)
HOW TO INSTALL
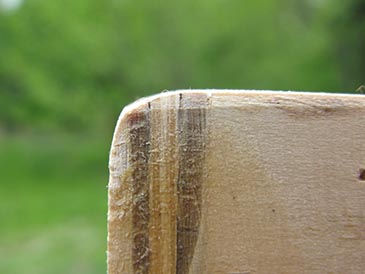
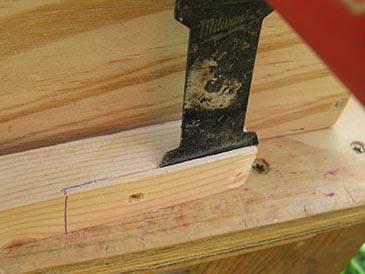
Step 1. Slightly round the outer edge of the front wall using a sander (or just sandpaper in your hand, but it will take longer). Between 1/16” and 1/8” radius is plenty. This way the top edge of the wall won’t catch on the lid as it opens and closes. The edge will be concealed under the lid, so it does not have to be meticulously uniform.
Step 2. Paint the hive as per insulated hive instructions.
Step 3. The two metal angles that will cover the corners of the front wall – cut them down to 18-5/8” so the top of the metal won’t catch on the lid when it opens and closes. Attach these angles with lath screws – bottom and mid-height – but don’t attach the top yet. These angles will be 1/4” shy of the top of the wall; this is all right because they will be covered by the lid.
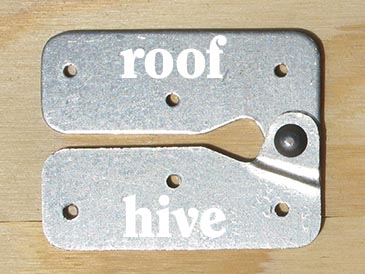
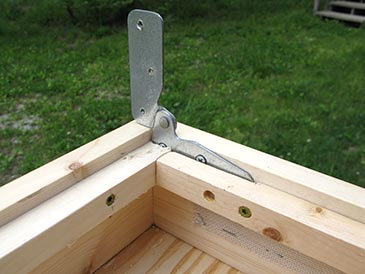
Step 4. Meet your hinges. Here is the outside view. Note the correct orientation when installed: the fold is under the pivot.
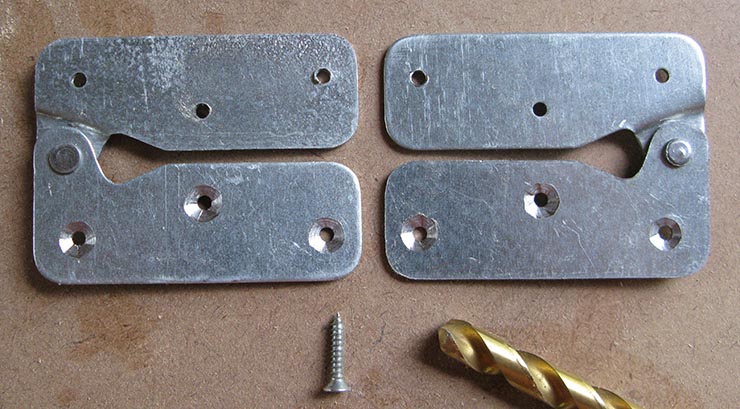
Step 5. Put the hinges in front of you as shown, the inside of the hinge facing up and the fold above the pivot. Using a drill bit, carefully drill the countersinks in the three lower holes. Thanks to these countersinks the head of the screw will be almost flush with the hinge when installed.
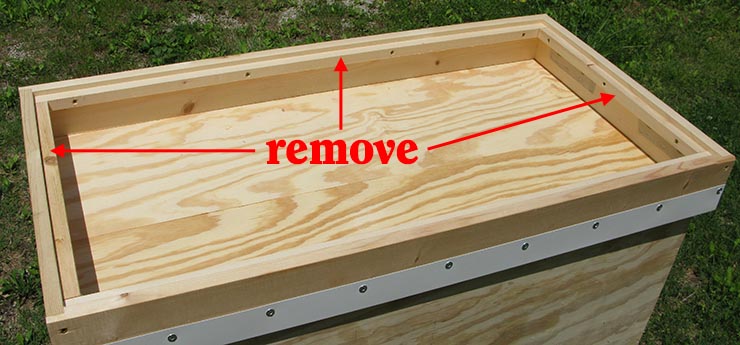
Step 6. Flip the lid over and remove one long slat and both short slats. Mark them A, B, and C so you can quickly put them back in the original position.
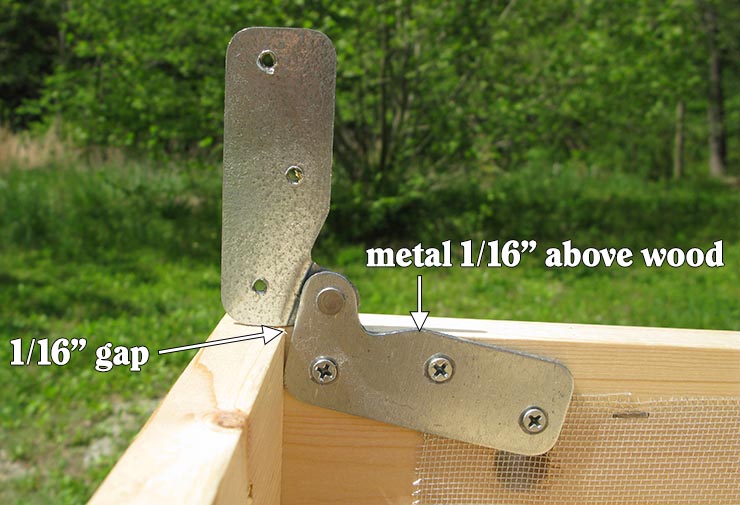
Step 7. Position one hinge as shown. The upper part is completely vertical, its butt end sits flat on the rim of the lid. The corner of the lower part of the hinge touches the rim of the lid, but there’s a 1/16” gap between the hinge and the rim where the two plates meet. Finally, the hump of the lower plate protrudes above the rim by 1/16”. Attach with three wood screws. Repeat with the other hinge.

Step 8. Re-attach the slats. Long slat: cut about 1/16” off each end (to allow for the presence of the hinges). Short slats: trim as shown; shift the position of the screw closest to the hinge (predrill to prevent splitting).
Step 9. Close the hinges, put the lid over the hive, the hinged side toward the front wall with the entrances. Make sure the hinge is horizontal (parallel to the rim of the lid) and its butt end is flush with the edge of the metal angle. There should be about 1/8” gap between the rim of the lid and the front hive wall, along the entire length of the wall. Attach with three lath screws. Finally, drive a lath screw into the front side of the metal angle just below the roof line.
Step 10. Open, close, and admire. To paraphrase Winnie-the-Pooh,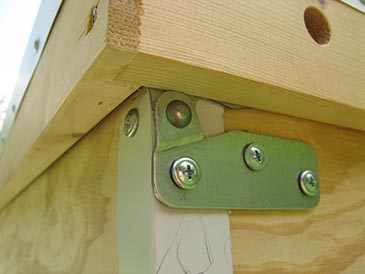

“So it does!” said Pooh. “It opens!”
“So it does!” said Piglet. “And it closes!”
“Doesn’t it?” said Eeyore. “It opens and closes like anything.”
And this is the end of the story for today!
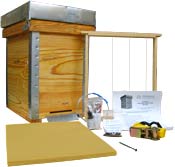
INSULATED LAYENS HIVES & HINGES AVAILABLE FROM OUR STORE >>
Hives include all frames, fully assembled & ready to go. Hinges sold separately.
If you haven’t signed up for our email list yet, please join it below so we can notify you when detailed Layens hive management recommendations and more free plans become available. (Only a few emails per year, and you can unsubscribe at any time.) We are working to bring you the bees... and the smile!
— Dr. Leo Sharashkin, Editor of “Keeping Bees With a Smile”