


Wire Layens Frames Quickly – Simple Jig – Free Plans
THIS WIRING JIG IS AVAILABLE FROM OUR STORE >>
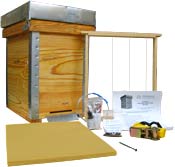
We also have hives, frames, etc. ready to go
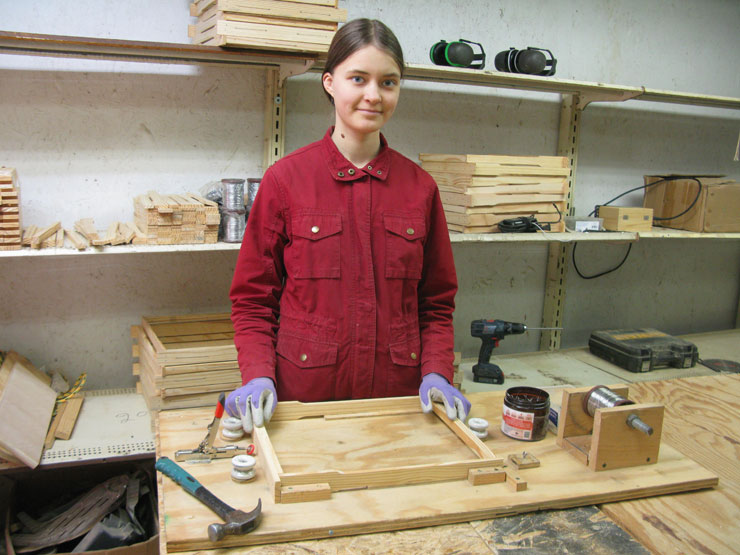
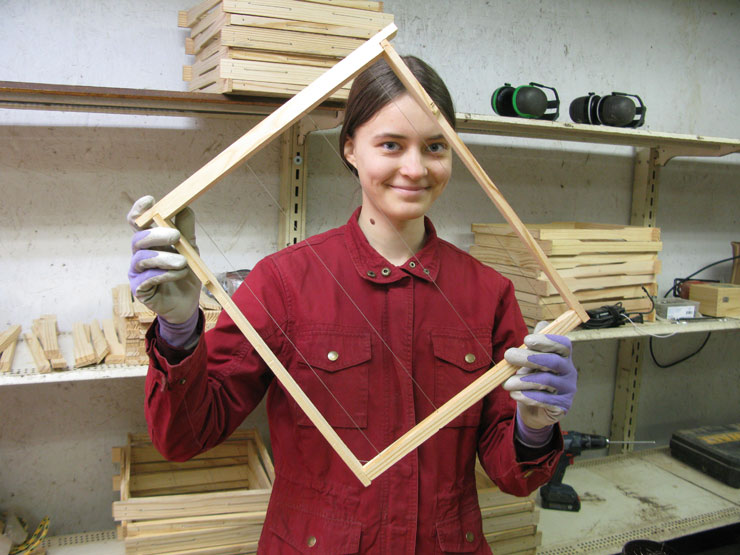
Lada can wire 40 Layens frames per hour. Going at that rate, in scant two years she saved enough for a fancy out-of-state college and went on a month-long trip to Europe. Even if you don’t want to go to college or Europe, you can still wire 40 frames per hour using a simple jig. It holds the frame securely so you can quickly run and anchor the wires. Here’s how to make it and use it.
Material list
- Plywood, untreated, 38” long by 20” wide. At least 3/4” thick or thicker; very square, clean, and flat, not warped. Can be conifer or hardwood species.
- Some scraps of “one-by” lumber, untreated.
- Horizontal toggle clamp, such as Bessey STC-IHH15.
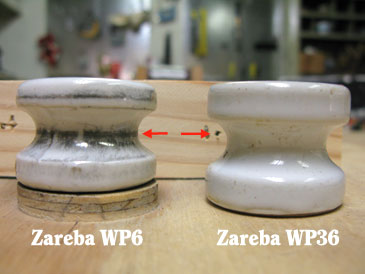
- Ceramic insulators (used in electric fencing), such as the large 1-3/4” Zareba WP36 (preferred) or standard-size 1-1/2” diameter Zareba WP6. You’ll need 3.
- Pan head sheet metal screws, #14 x 2” (qty: 3).
- Bolt, 1/2” diameter, 6” long, with a washer and nut.
- Eye screw, small (1/4” eye).
- 1-1/4” deck screws or drywall screws (18); 5/8” wood screws (4); 3/4” nails (12); some wood glue.
Tool list
You’ll need a table saw, a cordless drill/driver with bits, hammer, carpenter’s square, a 24” ruler and a tape measure.
Building instructions
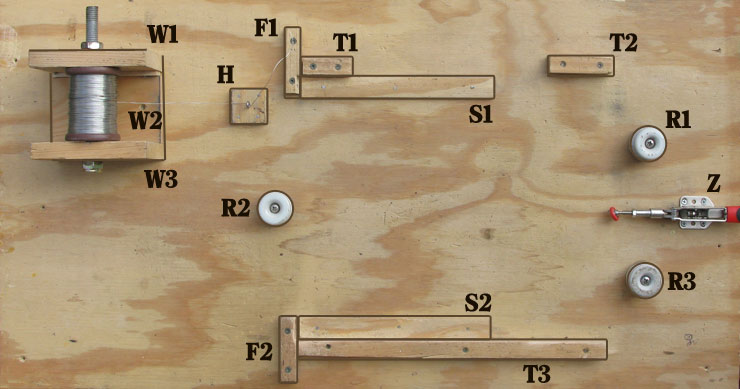
Step 1. Prepare the following parts:
- The Base — plywood, 38” x 20”
- Parts F1 and F2 — 3/4” x 3/4” x 3-1/4”. Use dense hardwood (maple or oak), if available.
- Parts T1 and T2 — 3/4” x 3/4” x 3” (wood)
- Part T3 — 3/4” x 3/4” x 15-1/2” (wood)
- Parts S1 and S2 — 9-1/2” x 1” x 1/4” (wood or thin plywood)
- Part H — 1-3/4” x 1-3/4” x 1/2” (wood or thin plywood)
- Parts W1 and W3 — 5-1/2” x 4-1/2” x 3/4” (wood)
- Part W2 — 5-1/2” x 3-7/16” x 3/4” (wood). See Note in Step 2 below.
Step 2. Make the wire-spool holder. Drill a 5/8” hole 3/4” on-center from the long side and 2-3/4” on-center from the short side on parts W1 and W3. One hole in W1 and one hole in W3. Put Part W2 between parts W1 and W3 (make sure the drilled holes are away from W2). Assemble on glue and screws. Note: this assumes you’ll be wiring your frames with the high-quality stainless steel wire that we offer in our Store. It comes on the spool 3-3/8” long. If you use any other kind of wire, spool sizes vary and you’ll need to make part W2 wider or narrower to accommodate your spool (W2 has to be 1/16” wider than your spool).


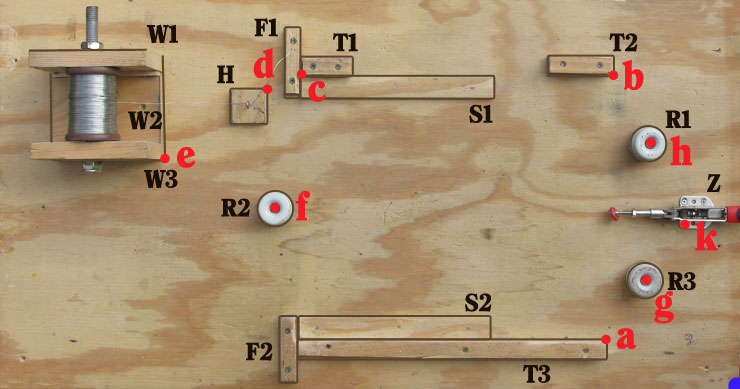
Step 3. Take your plywood base and mark the following points, as shown below. The bottom right corner (marked blue) is your point of reference. A large carpenter’s square is very helpful for this task.
- Point “a”: from the “blue corner” go LEFT 7-1/8”, then UP 2-3/4”. Mark point a.
- Point “b”: from point a, go UP 13” and mark point b.
- Point “c”: from point b, go LEFT 15-1/2” and mark point c.
- Point “d”: from point c, go LEFT 1-3/4”, then DOWN 5/8” and mark point d.
- Point “e”: from point d, go LEFT 5-1/8”, then DOWN 3-3/8” and mark point e.
- Point “f”: from point c, go DOWN 6-1/2”, then LEFT 1-1/8” and mark point f.
- Point “g”: from point a, go UP 3-3/16”, then RIGHT 1-7/8” and mark point g.
- Point “h”: from point b, go DOWN 3-1/8”, then RIGHT 1-7/8” and mark point h.
- Point “k”: from the “blue corner” go UP 8-3/4”, then LEFT 3-1/4” and mark point k.
Step 4. Attach the parts:
- Part T3. Draw a line from point a going Left. Position Part T3 along the line so its top right corner is in point a. Pre-drill, attach with glue and screws.
- Part S2. Position S2 so it touches T3 and the left edges of S2 and T3 are flush. Attach with glue and nails/brads.
- Part F2. Position F2 so it touches the butt ends of T3 and S2 and the top edge of F2 is flush with the top of S2. Pre-drill, attach with screws. Do not glue F2 — it experiences a lot of pressure and may eventually require replacement. It’s helpful if F2 is made of dense hardwood such as maple.
- Part T2. Draw a line from point b to point c. Position T2 along the line so its right bottom corner is in point b. Pre-drill, attach with glue and screws.
- Part T1. Position T1 along the line so its left bottom corner is in point c. Pre-drill, attach with glue and screws.
- Part S1. Position S1 so it touches T1 and the cb line, and the left edges of S1 and T1 are flush. Attach with glue and nails/brads.
- Part F1. Position F1 so it touches the butt ends of T1 and S1 and the bottom edge of F1 is flush with the bottom of S1. Pre-drill, attach with screws. Do not glue F1 — it experiences a lot of pressure and may eventually require replacement. It’s helpful if F1 is made of dense hardwood such as maple.
- Part H. Position H so its top right corner is in point d. Glue and nail.
- Wire-holder assembly W. Position the W assembly so W1 is parallel to the edge of the jig base, and the W bottom right corner is in point e. Pre-drill, attach with screws. Do not glue. If you ever decide to use wire spools of a different size, you would need to replace the W assembly.
Step 5. Attach the hardware:
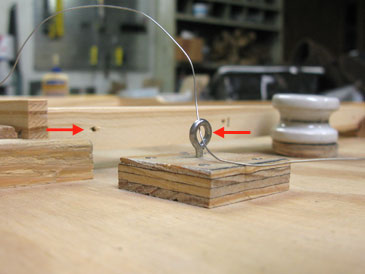
- Eye screw. Screw the 1/4” eye screw into the middle of part H so that it’s parallel to part F1 and the center of the eye is 3/8” above H. This way the center of the eye will be 3/4” above the surface of the jig base and will be level with the hole in the bottom bar of the frame. This is important for feeding the wire through the first hole.
- Three ceramic spools. Pre-drill 1/8” pilot holes in points g, h, and f. If you use larger spools such as Zareba WP36, attach them with #14 screws so the spool can freely rotate but cannot go up and down on the screw. If the screw protrudes on the other side of the plywood, trim it off with an angle grinder. If you use a smaller insulator such as Zareba WP6, make a thin plywood washer the same diameter as your spool. The thickness of the washer would be around 1/4” — so that the center of the spool’s groove is 3/4” from the jig base and level with the holes in the frame. Drill a 1/8” hole in the center of the washer, glue & nail it, centered around the screw hole in the jig base, then attach the spool.
- Attach your horizontal clamp. If using the Bessey STC-IHH15 clamp, attach it with a wood screw going through the left bottom hole in the clamp’s base into point k. Make sure the clamp’s base plate is perpendicular to the edge of the jig, then secure it with three more screws. If you use a different clamp, position its central axis 6-1/2” down from point b. Adjust its left-right placement so that when closed, it clamps the frame securely.
- Load wire. Insert the spool of wire between W1 and W3 so that the wire unwinds from the bottom of the spool (closest to the W2 surface) in the direction of the eye screw. Hold the spool in place with the 1/2” diameter bolt, washer, and nut. We recommend that you use stainless steel wire that is available from our Store. It is strong (won’t break during wiring), will not corrode and does not leach into wax/honey.
Make sure the top bars and the bottom bars are stapled as shown below. These staples, positioned 1/16” from the holes through which wire will go, prevent it from cutting into the wood when tensioned. Preferably staple the top bars and bottom bars before frame assemply, but you can also staple the assembled frame after giving glue 24 hrs to set.
Step I. Place the Layens frame in the jig. The bottom bar presses against F1 and F2, and the end bar against T1 and T2. Clamp it. The spacing between T3 and T1/T2 is 1/16” wider than the frame (so you can move it in and out), so there will be a small gap between the frame and T3.
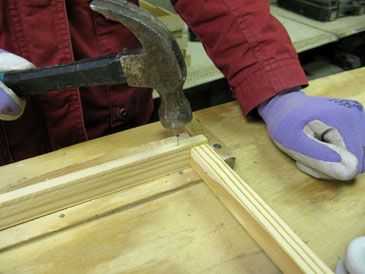
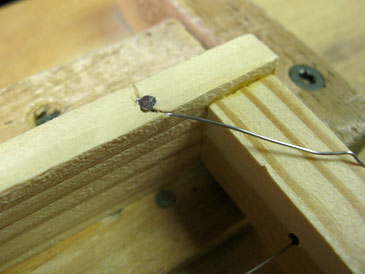
Step II. Drive a 3/4” nail into the lower part of each end bar, about 3/8” from the bottom bar. Leave the nails sticking out by 3/8”.

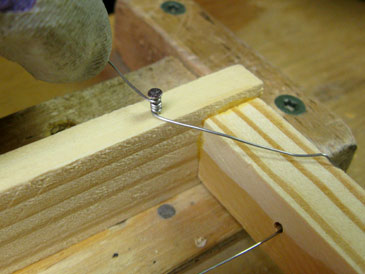
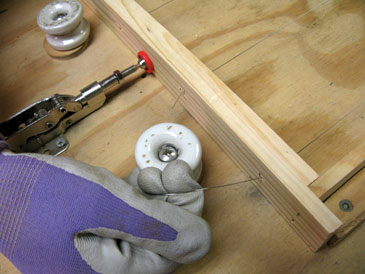
Step III. Run the wire through the holes and over the spools as shown. The wire should go over the central groove of the ceramic spools. Let the wire protrude 5” or 6” from the last hole in the bottom bar. Tip: if the tip of the wire is bent or wavy, making it difficult to push it through the hole, snip the tip off with a wire cutter or metal sheers.

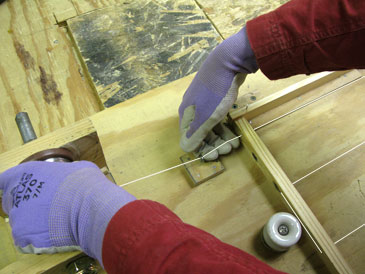
Step IV. Grab the loose end of the wire and twist it around the nail closest to you. Make 4 revolutions. As you hold the wire tight with your left hand, hammer the nail flush with the wood. Pull and rotate the loose end of the wire in a circle, like a tornado, and it will cleanly break off. The wire is now securely anchored so you can start to tighten it.
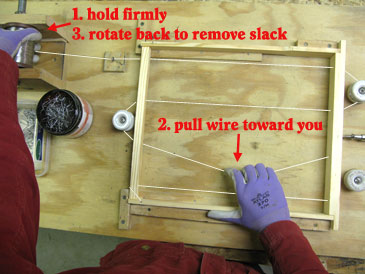
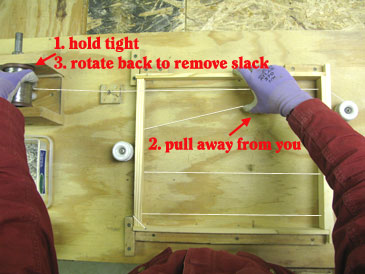
Step V. Tightening the wire is done in several stages. Your right hand manipulates the wire while your left hand rotates the wire spool backward to feed any excess wire back to the spool.
- Rotate the wire spool backward to pull wire and remove as much slack as you can.
- Take the wire off the last roller and rotate the wire spool back to remove slack.
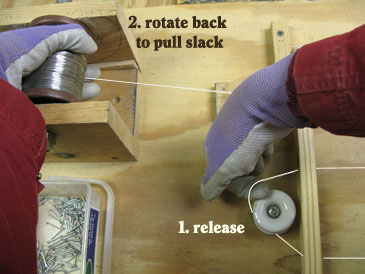
- Hold the wire spool firmly as you pull the second-closest-to-you wire toward you. (This tightens the wire closest to you.) As you release your right hand, rotate the spool backward to remove the slack.
- Take the wire off the second roller and rotate the wire spool back to remove slack.
- Hold the wire spool firmly as you pull the third-closest-to-you wire away from you. (This tightens the second-closest wire.) As you release your right hand, rotate the spool backward to remove the slack.
- Take the wire off the remaining roller and rotate the wire spool back to remove slack.


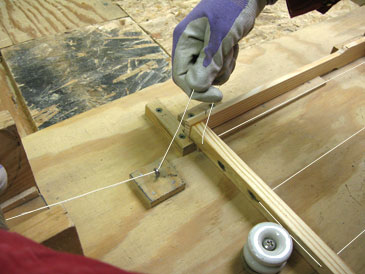
Step VI. You need to twist wire around the nail. Grab the wire between the eye screw and the frame and pull it up, releasing only as much wire from the spool as necessary. Pull the wire over the edge of the bottom board toward the nail. Still pulling, twist it around the nail 4 times, drive the nail in with a hammer, then spin the wire until it breaks off.
The frame is ready and sounds like a harp. With some practice you’ll be able to wire a frame in 90 seconds or less. Have fun!
THIS WIRING JIG IS AVAILABLE FROM OUR STORE >>
We also have hives, frames, etc. ready to go
If you haven’t signed up for our email list yet, please join it below so we can notify you when more free Layens plans become available. (Only 2-3 emails per year, and you can unsubscribe at any time.) We are working to bring you the bees... and the smile!
— Dr. Leo Sharashkin, Editor of “Keeping Bees With a Smile”