


Assemble Layens Frames Quickly – Simple Jig – Free Plans
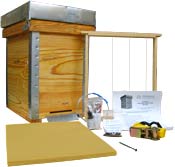
LAYENS HIVES AND FRAMES AVAILABLE FROM OUR STORE >>
Hives include all frames, fully assembled & ready to go
With this simple-to-build jig you can assemble 100 Layens frames per hour using a narrow-crown staple gun. The jig holds all the parts of the frame perfectly square so you can staple it together with great speed and precision.
Material list
- Plywood, untreated, 15” x 17-9/16”. At least 3/4” thick or thicker; very square, clean, and flat, not warped. Can be conifer or hardwood species.
- “Two-by-four”, untreated, 14”.
- 1-1/8” or 1-1/4” wood screws, 9.
- 1” nails, very thin (17 gauge), 12.
- Wood glue, small quantity.
Tool list
This simple project only requires a table saw, cordless drill/driver, hammer, and a tape measure.
Building instructions
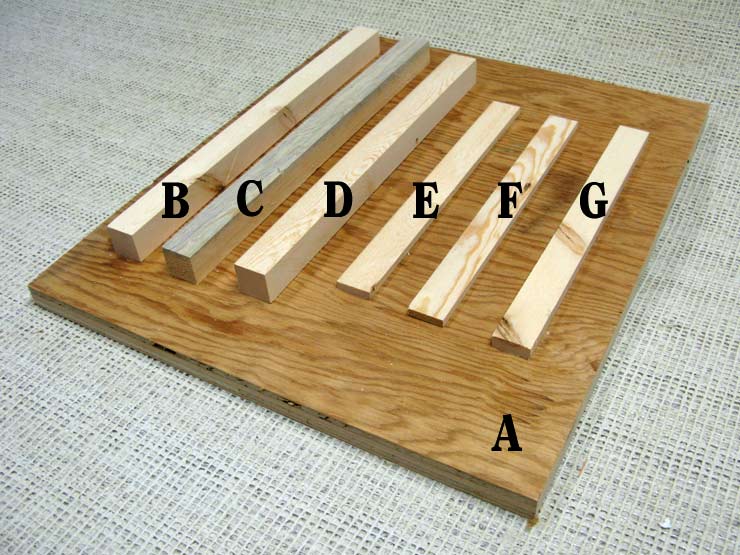
Step 1. Cut the following parts:
- Part A — plywood, 15” x 17-9/16”
- Parts B and C — wood bars 1” x 1” x 14”
- Part D — wood bar 1” x 1” x 13”
- Parts E and F — wood bars 1” x 1/4” x 10-3/8”
- Part G — wood bar 1” x 3/8” x 10-5/8”
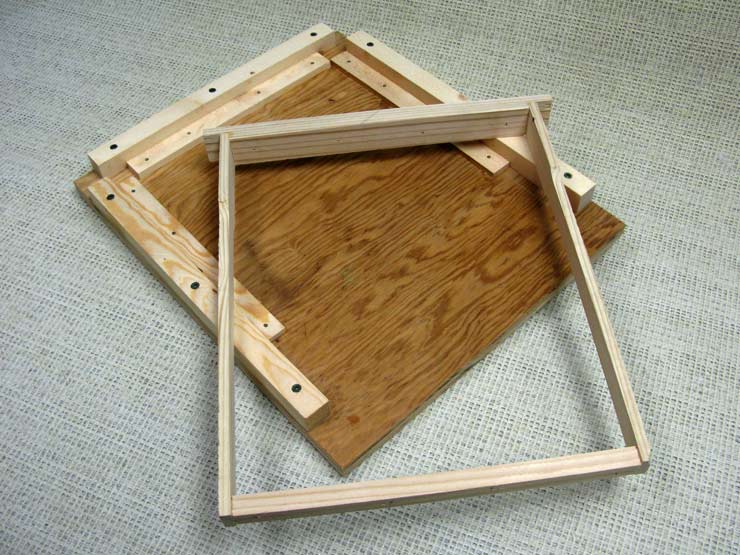
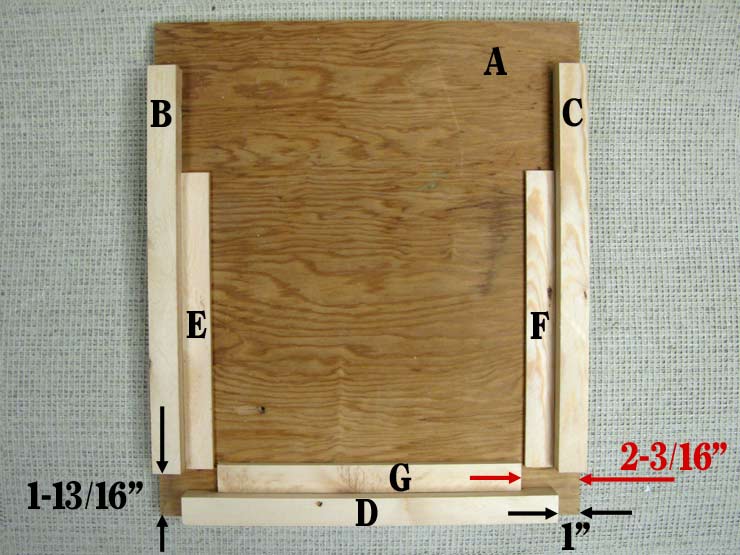
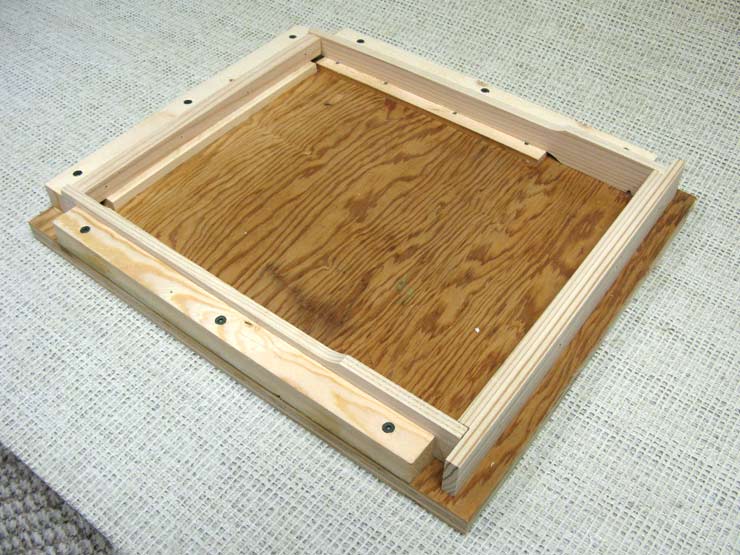
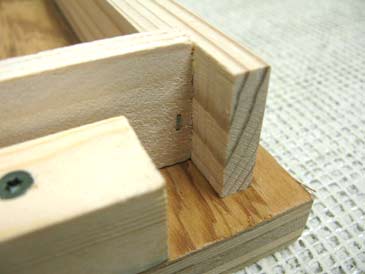
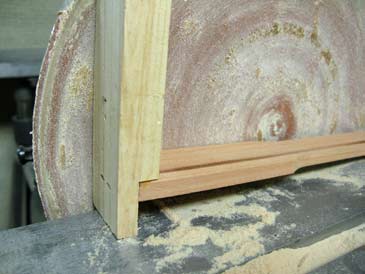
Step 2. Lay out all the parts as shown below.
- Parts B and C go flush with two sides of Part A, 1-13/16” from its lower edge.
- Parts E and F go flush with Parts B and C, 1-13/16” from the lower edge of Part A.
- Part D is centered flush with the lower edge of Part A, 1” from its right and left edges.
- Part G is flush against Part D and centered, 2-3/16” from Part A’s right and left edges.
Step 3. Attach all the parts to the plywood using wood glue, screws (for Parts B, C, D — 3 per bar; predrill to avoid splitting wood), and nails (for parts E, F, and G — 4 per bar). Wipe off excess glue. You are done! Let it dry for 24 hrs and the jig is ready for use.
How to use the jig
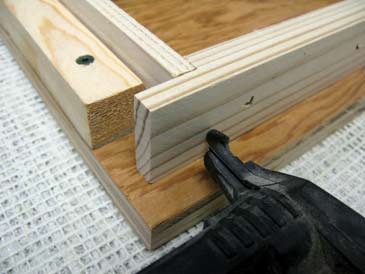
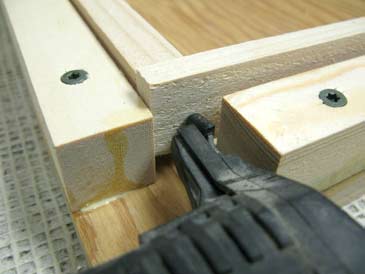
Step I. Glue joints and position all frame parts inside the jig.
Step II. Using a staple gun with 1” staples (1/4” crown) attach the top bar to the end bars (2 staples per joint).
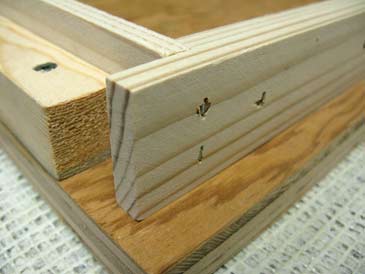
Step III. Staple the end bar back to the top bar (1 staple per corner).
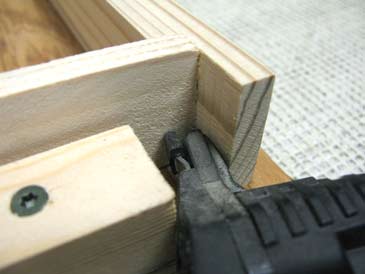
Step IV. Finally, staple the bottom of the end bars to the bottom bars.
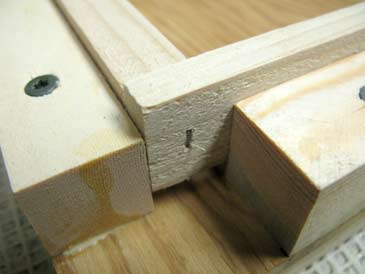
The frame is ready. Repeat Steps I–IV to assemble more frames as needed. Using this simple approach I can assemble a frame in 20 seconds if I’m being watched, and in 30 seconds if I’m lazy. That’s 100 or more frames per hour. Make sure you stop before frame skyscrapers go through the roof!

Some tips and precautions
- Wear hearing and eye protection and gloves.
- Never hold down frame parts within 1-1/2” of where you are driving the staple in — the staple may blow out and pierce your fingers.
- Let the frames dry for 24 hrs before wiring.
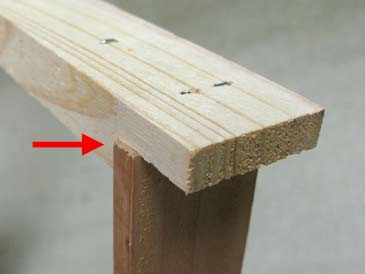
- If the end bars protrude beyond the top bar, sand them down on a disc sander or belt sander. If you leave this ledge untouched, it will create a crack between two adjacent top bars, which bees will fill with propolis.
- A big-name stapler does not guarantee performance. My DeWalt narrow-crown stapler did not even last 5,000 frames. I’m now using a Makita (AT638A), but cannot report on the longevity yet. Staples from a large variety of manufacturers (Senco, SpotNails, etc.) proved equally satisfactory.
LAYENS HIVES & FRAMES AVAILABLE FROM OUR STORE >>
Hives include all frames, fully assembled & ready to go
If you haven’t signed up for our email list yet, please join it below so we can notify you when more free Layens plans become available. (Only 2-3 emails per year, and you can unsubscribe at any time.) We are working to bring you the bees... and the smile!
— Dr. Leo Sharashkin, Editor of “Keeping Bees With a Smile”