

in horizontal hives.

Extra-deep Frame - Do It Yourself
Some prefer a garden full of bees to a workshop full of sawdust. Let’s support that! Here is a greatly streamlined way to build the extra-deep frames for your horizontal hives. This design uses regular “two-by-” and “one-by-” pine lumber, and the only tools you need are a miter saw (or regular hand saw), a table saw, a drill, and a screwdriver! There are no complex cuts, and you can cut a hundred frames like that in a day (excluding assembly and wiring). Assuming a knot-free board, lumber costs can be under 30 cents per frame.
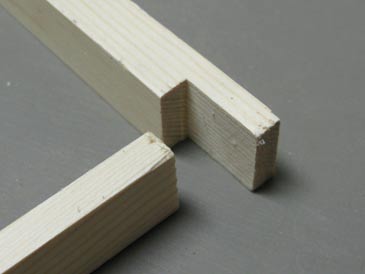
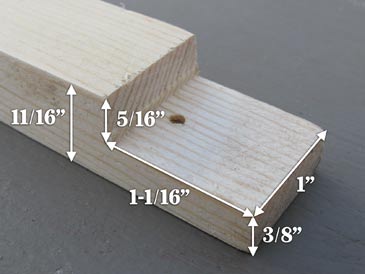
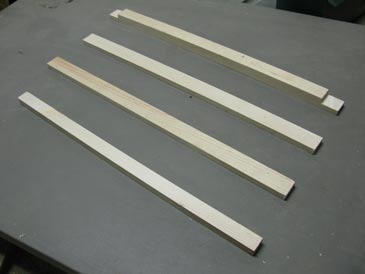
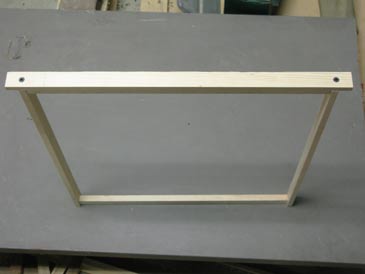
This frame has the same dimensions as the one used by Fedor Lazutin (pp. 339 and 370 of Keeping Bees With a Smile). Its length is that of standard Langstroth (17-5/8” long with a 19” top bar) and it is 18-1/2” deep. It consists of four parts: a top bar, two identical end bars, and a bottom bar, connected using the most basic butt joints:
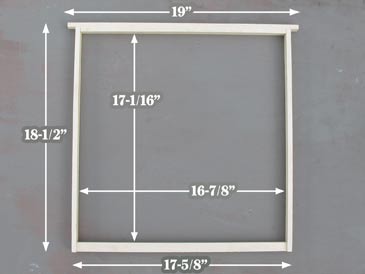
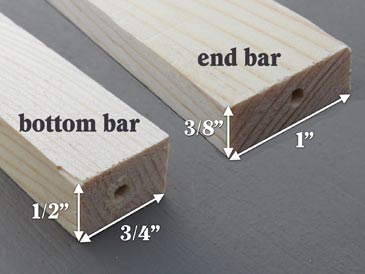
Here are all the dimensions:
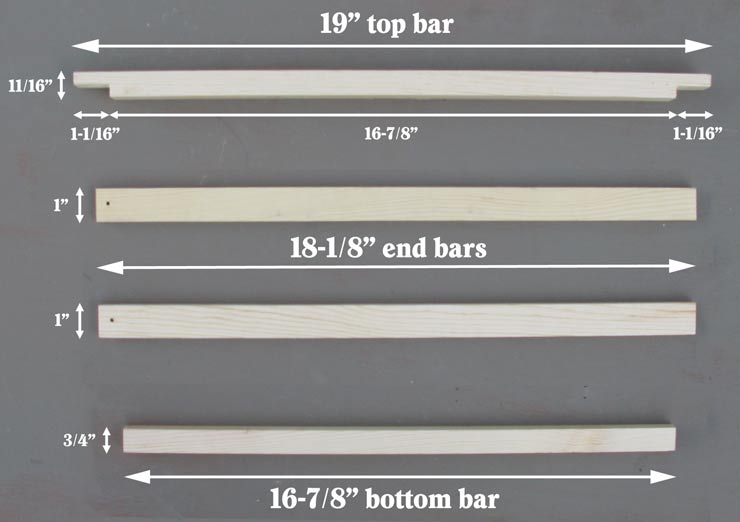
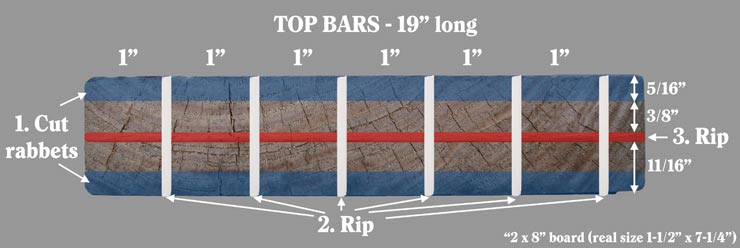
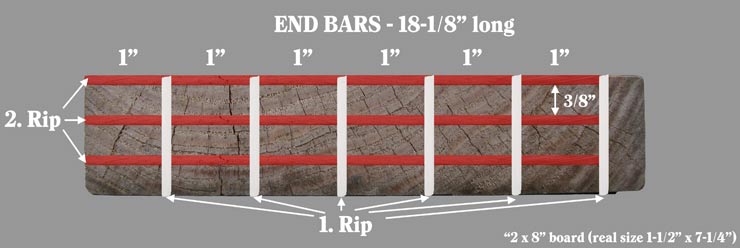
Here is how you rip the “2-by-” lumber for top bars and end bars:
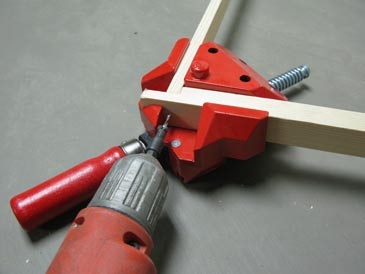
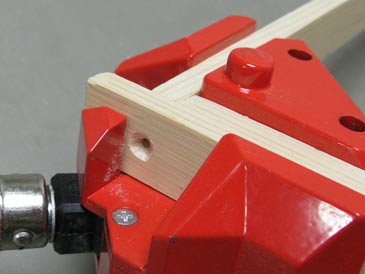
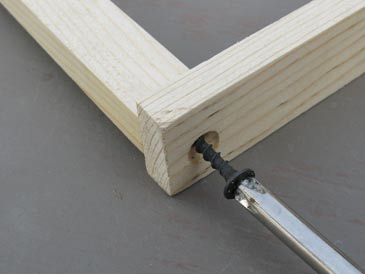
Once you have all the parts, assembly is easy. Clamp at 90 degrees, pre-drill and assemble on four 1-1/4" drywall screws and wood glue:
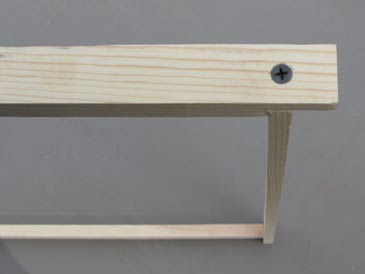
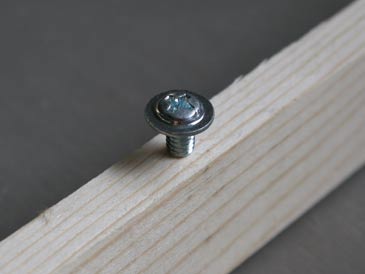
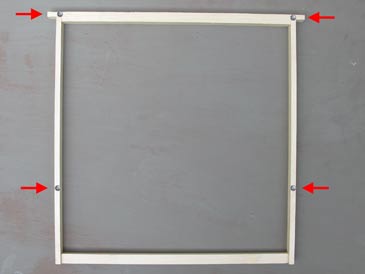
Finally, to maintain the required spacing between the frames in the hive, you need some kind of divider. I like to use 1/2” sharp-point lath screws. I put four screws on each side of the frame. To obtain 1-3/8” spacing, let them stick out by 3/16” (or 1/4” for 1-1/2” spacing). Drive the screws at exactly the same spot on all frames (e.g., at the very top and 12” down from the top end of each end bar).
These frames are meant to be wired vertically using regular tin wire. This way put no strain on the end bars and can keep them just 3/8” thick and use standard wax foundation (two deep sheets). You can also go foundationless by using a 1” starter strip of wax foundation. Suggested wire hole spacing is the same as in the mortise-and-tenon plans.
Building instructions
Top bars:
- Cut a 19” piece of “two-by-” lumber.
- Cut four rabbets 5/16” deep and 1-1/16” wide on the board’s both ends.
- Rip it into 1” bars.
- Rip each bar in the middle, obtaining two top bars.
- Mark and drill holes for wiring (tip: drill from the bottom side and keep all holes on the same line).
End bars:
- Cut an 18-1/8” piece of “two-by-” lumber.
- Rip it into 1” strips. You’ll end up with bars 1” x 1-1/2”.
- Rip each bar into three 3/8” bars. Done!
Bottom bars:
- Cut a 16-7/8” piece of “one-by-” board.
- Rip it into strips 1/2” wide.
- Drill holes for wiring (tip: drill from the side that will face upward and keep all holes on the same line).
This frame is very similar to the mortise-and-tenon version, but is much simpler to build. One important distinction is that the top bars on this model do not touch (there is bee space between adjacent top bars in the hive), so if your horizontal hive does not have a bee space (3/8”) above the top bars, you’ll have to cover the frames with a cloth to prevent the bees from gluing the top bars to the hive’s top.
I’ll appreciate your comments, suggestions, or questions. Wishing you a wonderful beekeeping season!
— Dr. Leo Sharashkin, Editor of “Keeping Bees With a Smile”
Please join our email list below for more free plans and important updates (no spam; only 2-3 emails per year, and you can unsubscribe at any time). We are working on bringing you the bees... and the smile!