

in horizontal hives.


Layens Bait Hive / Starter Hive / Frame Box – Free Plans
LAYENS HIVES, FRAMES & SWARM TRAPS AVAILABLE FROM OUR STORE >>
Hives include all frames, fully assembled & ready to go
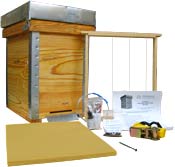
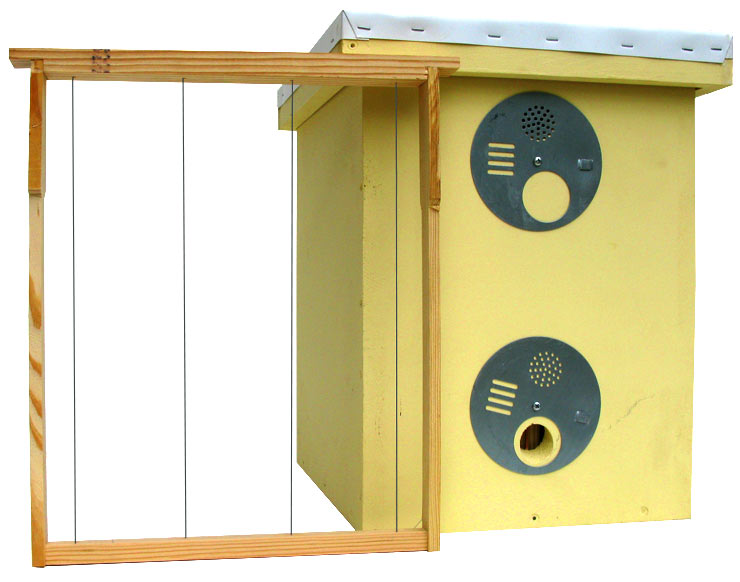
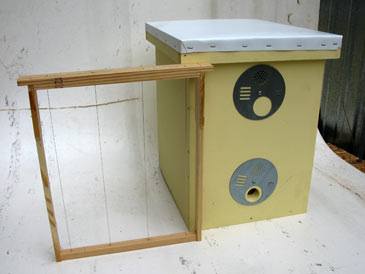
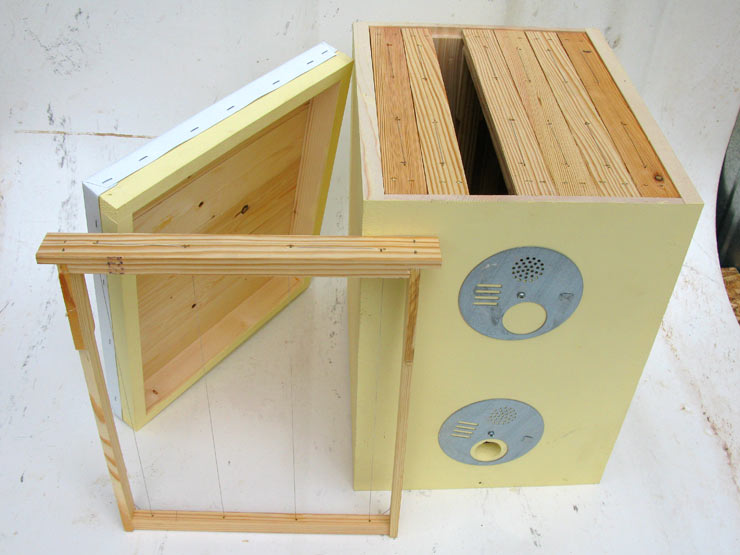
The seven-frame solid-wood Layens bait hive is a culmination of years of experimentation and successful swarm catching. It has the right volume (about 40 L) to be hugely attractive to swarms. The upper entrance aids ventilation and prevents overheating. Durable steel gates don’t warp in the sun and alternate between open, fully closed, ventilation, and queen excluder settings. The top has a generous overhang to shed water. The 3/4” solid wood construction is long-lasting and offers enough insulation to overwinter small colonies in mild climates. You can even remove the side wall and connect two boxes together to form a 14-frame Layens hive! Also, use it for Layens splits / nucs and for holding frames during harvest — extremely versatile! Plus, working with wood is just more pleasurable than busting plywood. Enjoy!
This seven-frame Layens hive weights 20 lb with frames. If you plan to use is as a swarm trap and weight is an issue, consider building the 6-frame plywood version which is 5 lb lighter.
Material list
- 1” x 12” x 10’ board, conifer (pine, fir), untreated. Actual lumber thickness is 3/4”.
- 16” x 18” scrap piece of 1/4” plywood, untreated, or some scraps of “one-by” lumber at least 16” long.
- 20” x 18” piece of aluminum flashing or trim coil.
- Entrance gate discs (2), steel (available from our Store).
- 1-5/8” deck screws (36).
- 9/16” T50 staples or 1/2” lath screws (12).
- 1” narrow-crown staples or 1” nails.
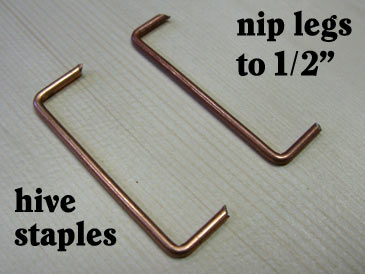
- Hive staples (2) or 2-1/2” nails (2).
- Double-pointed tacks, 3/8” #5 (2) — optional but handy.
- Wood glue (e.g., Titebond III), less than 1 oz needed.
- Exterior acrylic primer/sealer (1 quart per 5 swarm traps) and light-colored exterior acrylic paint (1 quart per 5 swarm traps); a roller or a wide brush.
Tool list
You can complete this project using a variety of tools. This is what I use:
- Table saw.
- Sliding miter saw (alternative: circular saw or hand saw with a guide).
- Drill/driver with 1-1/4” paddle bit, #8 pilot bit with countersink, and driver bits.
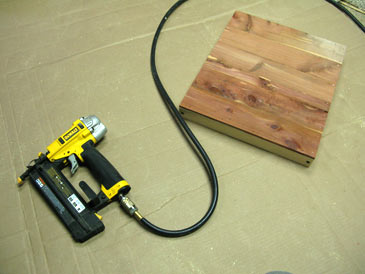
- Air compressor with a T50 staple gun (alternative: manual T50 stapler or screw driver and lath screws) and narrow-crown staple gun (alternative: hammer and 1” nails).
- Square, tape measure, utility knife, metal shears.
Building instructions
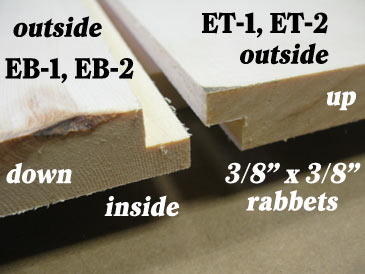
Step 1. Rip the 1” x 12” x 10’ board to 11” wide. Then cut it as shown. You’ll end up the following parts: F and B, 17-1/2” x 11” (front and back walls). • BOT, 13-11/16” x 11” (bottom). • ET-1 and ET-2, 15-3/16” x 11” (end walls, top halves). • EB-1 and EB-2, 15-3/16” x 6-7/8” (end walls, bottom halves). • RS-1 and RS-2, 14-3/8” x 1-5/8” (cover rim, short parts). • RL-1 and RL-2, 15-9/16” x 1-5/8” (cover rim, long parts).

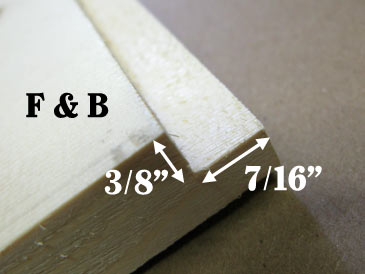
Step 2. Cut a rabbet 3/8” x 7/16” along one 11” edge of parts F and B. These are the frame rests.
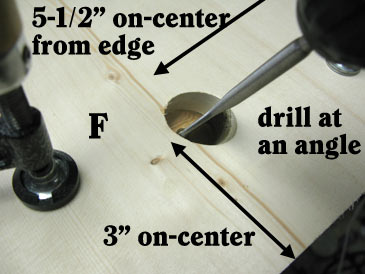
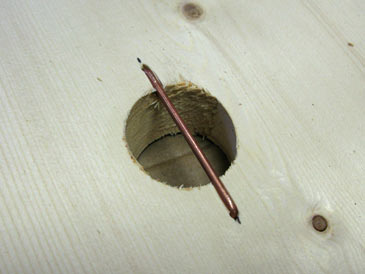
Step 3. Place part F on a block of wood the rabbeted side facing down and the rabbet away from you. Drill two 1-1/4” holes, centered, 3” from the top and bottom edges. Drill at the angle of 25 to 30 degrees from the vertical (the bottom of the drill tilted towards you and the bottom 11” edge without the rabbet), so it sheds water. These are entrances.
Step 4. Flip part F over. The rabbet is now facing up. Trim hive staples to 1/2” leg length and drive them over the middle of each entrance hole, oriented top-bottom. This prevents bird entry (it’s a bee house, not a bird house). If you don’t have hive staples, take a 2-1/2” nail, bend 1/2” of the sharp end at the right angle, then drive it in the same position as the hive staple, with the head of the nail pointing down.
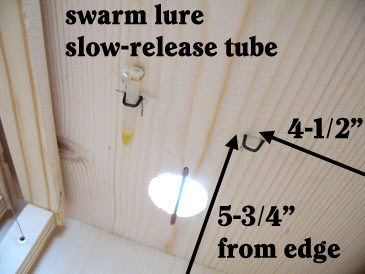
Step 5, optional. If you plan to use slow-release tubes filled with swarm lure to attract swarms, drive two double-pointed tacks (on the same side as the hive staple), near the lower entrance, 5-3/4” from the bottom edge and 4-1/2” from each side. The tack is oriented horizontally and protrudes enough to keep the swarm lure vial. If you skip this step, use bits of twist tie to attach swarm lure tubes to the hive staples that cross the entrance.
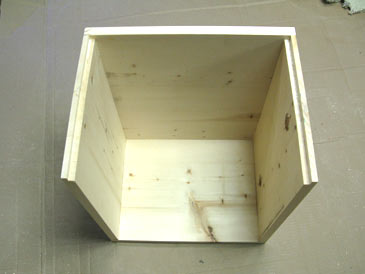
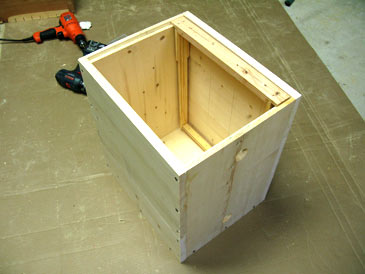
Step 6. Position part BOT between parts F and B (both rabbets face inside), check for the right angle and assemble on glue and 1-5/8” deck screws. Predrill with a countersink bit to prevent splitting.
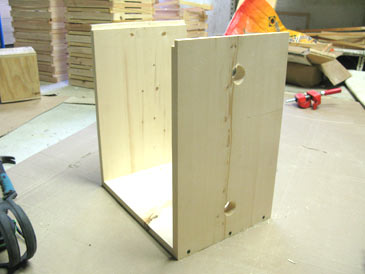
Step 7. Cut 3/8” x 3/8” rabbets along one 15-3/16” edge of each of the parts ET-1, ET-2, EB-1, and EB-2. Glue ET-1 and EB-1 together. Glue ET-2 and EB-2 together. You now have two panels 15-3/16” x 17-1/2” which are the side walls. Attach them to the assembly you made in Step 6, on screws only, no glue (this way you can later remove this wall to connect two boxes together to make a 14-frame hive). The box is ready.

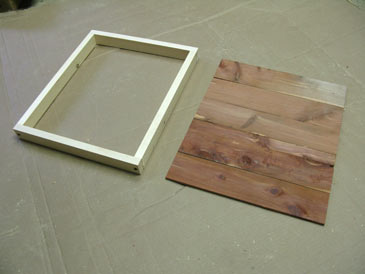
Step 8. Position parts RL-1 and RL-2 between parts RS-1 and RS-2, check for the right angle, and assemble on glue and 1-5/8” scres, 1 per corner. This is the rim of the hive cover.
Step 9. Cut a piece of 1/4” plywood 17-1/16” x 14-3/8” or cut some scrap pieces of “one-by” boards to cover the same area. If you choose solid wood, use full thickness of “one-by” (3/4”) or rip it to 1/4” thick. The 3/4” option is better insulation and less work, but adds to the weight of the hive. Attach plywood or wood planks to the rim with glue and staples or nails (1” for 1/4” cover thickness; 1-1/2” fasteners if using 3/4” boards).
Step 10. Paint the box and the rim of the cover before installing aluminum cover and entrance gates. Apply a coat of primer (to the outside only), let dry. Apply one or two coats of paint.
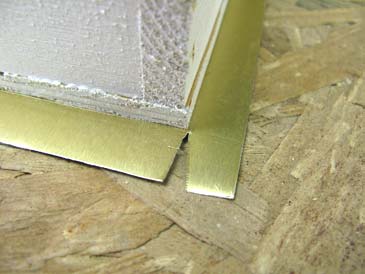
Step 11. Cut a piece of aluminum flashing or trim coil 20” x 17-5/16”. Put the lid in the center of the aluminum and lightly score the perimeter. Cut out triangles at each corner, then fold the aluminum over the lid and secure with staples (T50, 9/16”) or screws (1/2” lath screws).
Step 12. Install entrance gates. Mark holes 4-3/8” from the bottom and the top of the front wall, on the central axis, and attach with 5/8” pan head screws. Entrance gates are available from our Store.
Step 13. For best results use your swarm traps as described in our Swarm catching guide. Have fun!
LAYENS HIVES, FRAMES & SWARM TRAPS AVAILABLE FROM OUR STORE >>
Hives include all frames, fully assembled & ready to go
If you haven’t signed up for our email list yet, please join it below so we can notify you when free horizontal hive plans and detailed management recommendations become available. (Only 2-3 emails per year, and you can unsubscribe at any time.) We are working to bring you the bees... and the smile!
— Dr. Leo Sharashkin, Editor of “Keeping Bees in Horizontal Hives”